
 (54).png)
To manage categories on your website, follow these steps:
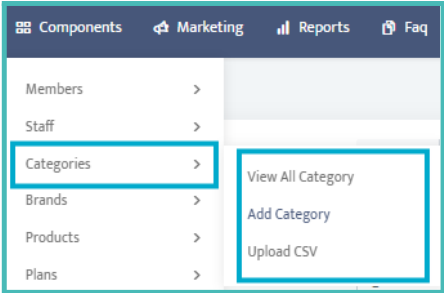
1. Go to Components > Categories.
2. Here, you can choose from the following options:
● View All Categories: Edit or delete existing categories.
● Add a Category: Create a new category.
● Upload a CSV File: Import categories from a CSV file.
3. When Adding a Category, you will be able to:
a. Set Title: Name your category.
b. Select Background Image: Choose an image to represent your category.
c. Select Parent Category: If applicable, assign this category as a subcategory under an existing category.
d. Set Category Name: Enter the name for your category.
e. Set Description: Provide a description for the category.
f. Set Thumbnail Icon: Upload a 50 x 50 px JPG icon for faster loading times.
g. Set Category Image: Upload a 200 x 200 px JPG image for faster loading times.
h. Optionally, you can also set meta tags for this category, including:
Meta Title
Meta Description
Author's Name
Meta Keywords
4. After filling in the necessary details, click the Submit button to save your changes.

5. To Edit a Category, click the pen icon next to the category you wish to edit on the left
side of the screen. Follow the same steps as when creating a new category, and
remember to click Submit to save any changes you make

This process helps you organise your content effectively, making it easier for visitors to navigate your site