

MANUAL, EVENT AND SCHEDULE EMAILS
MANUAL EMAILS
Manual emails can be created and sent to individual customers or a group of customers.
SCHEDULED EMAILS
Can be set to a date and time in which to be sent to an individual customer. You can create your emails and get them ready to be sent out.
EVENT EMAILS
Connect to your customer database and emails can be sent to customers depending on customer behavior.
e.g. When a customer signs up with your website, if you upload a new product/service in which they will be notified of
If you are unsure about your email content, you can also test it out by sending an email to yourself to make sure your content is correct or is being seen in the correct way
MARKET
RETAIN
UP SELL
GROW YOUR BUSINESS WITH CUSTOM EMAILS
We added emails that you will need to grow your business
Lapsed purchaser
Win back subscribers who have not purchased in recent months.
Blog post announcement
Automatically send a newsletter to all subscribers after a blog post is published.
New Product release
Show customers new products to try out.
Sales Funnels
Upsell your products
Sales Funnels
Upsell your products
Discount reminder
Remind subscribers of expiring discounts/sales.
Abandoned cart
Recover subscribers who abandoned a purchase.
New purchaser
Thank subscribers after their first purchase.
Repeat purchaser
Thank subscribers again after their second purchase.
Review request
Request subscribers review products recently purchased.
1. CREATING AN EMAIL CAMPAIGN
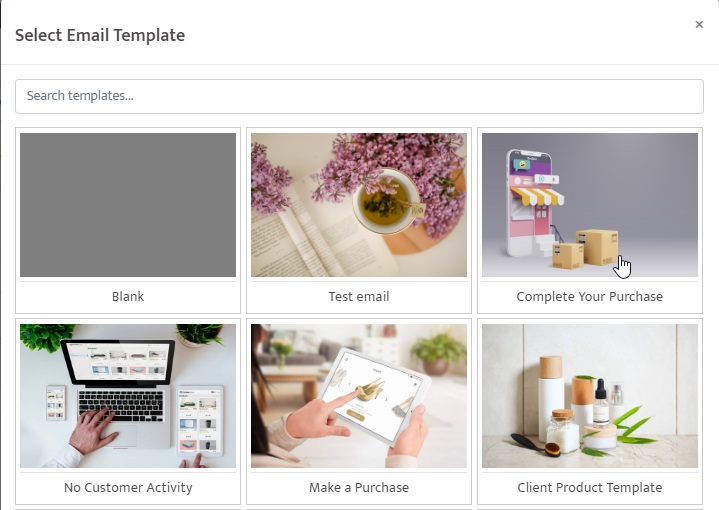
Thereafter, select a template and begin editing the template in context of your campaign.
.......
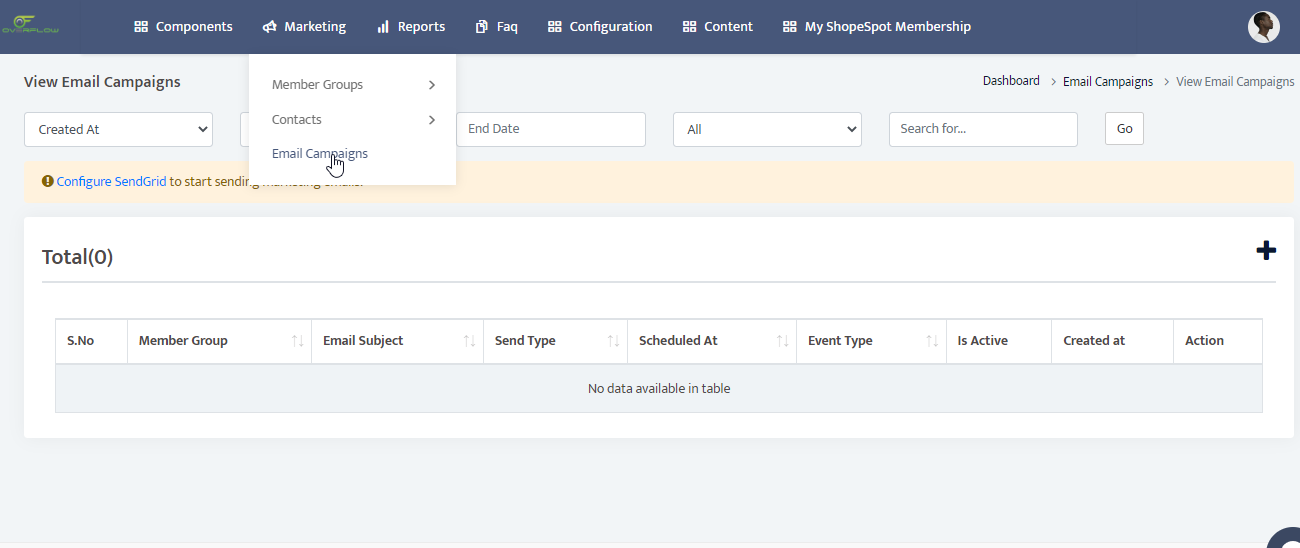
Go to the Marketing tab in your dashboard. Click on Email campaigns.
Click on the + sign on the right-hand side of the screen to start a new campaign.
2. CREATING MEMBER GROUPS FOR EMAILS
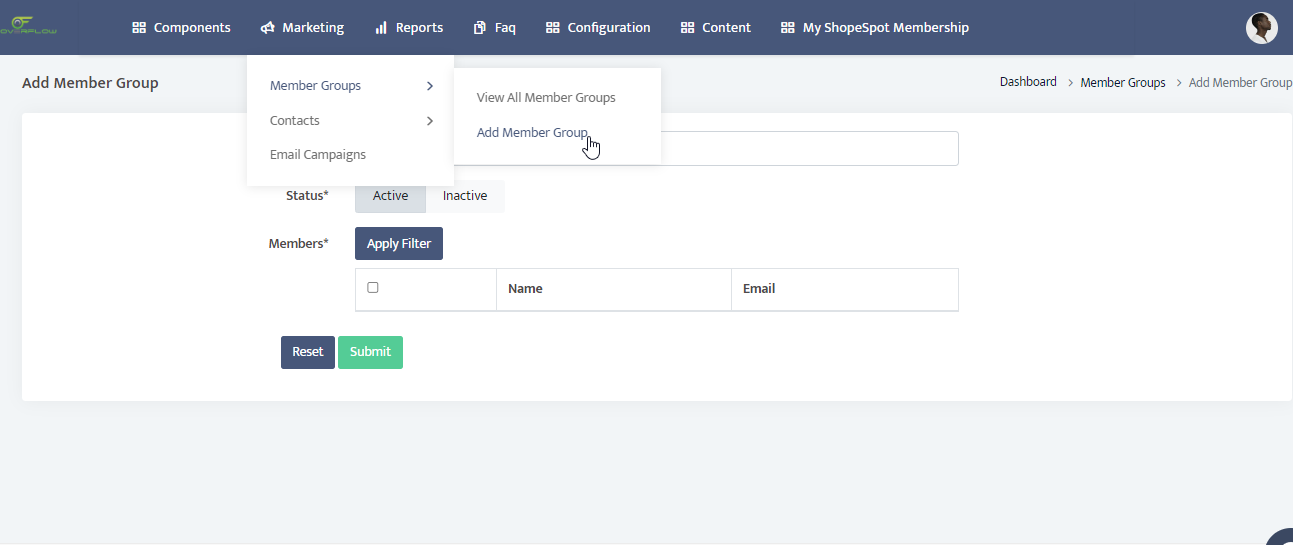
Go to the Marketing tab on your dashboard. Click on Member groups and edit the members that you wish to receive the email. Make sure you check the box next to their name in order for them to receive the email, also give this group a name.
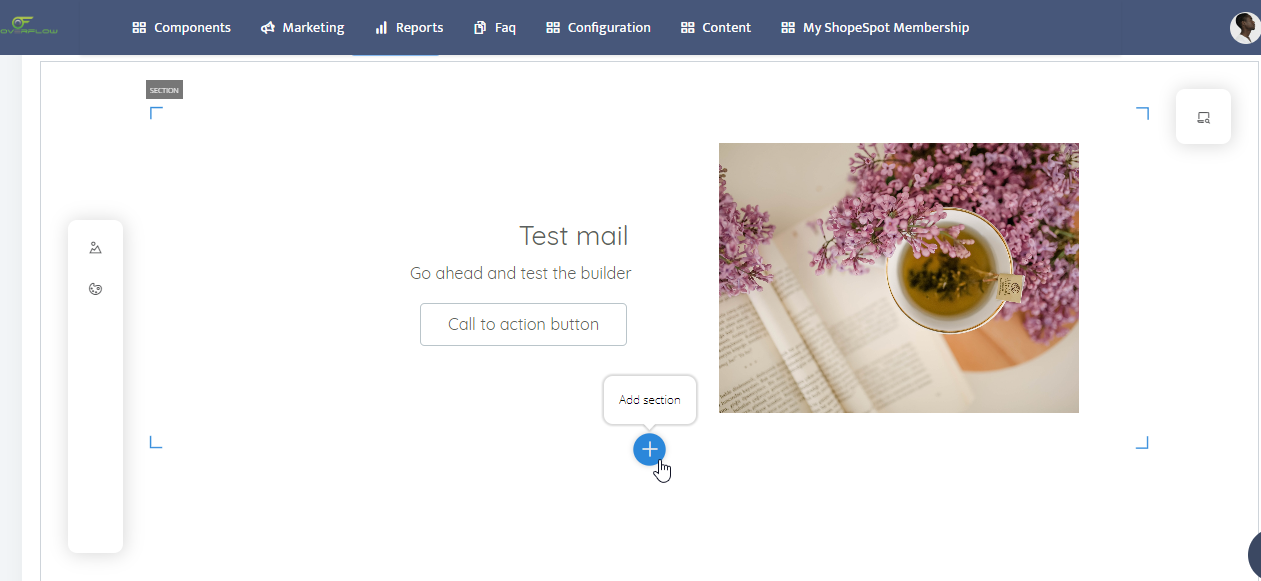
3. EDITING AN EMAIL

Select a member group to receive the email you are about to create. Choose an option from the drop-down list.
Then add a title to your email.
4. SHORTCODES
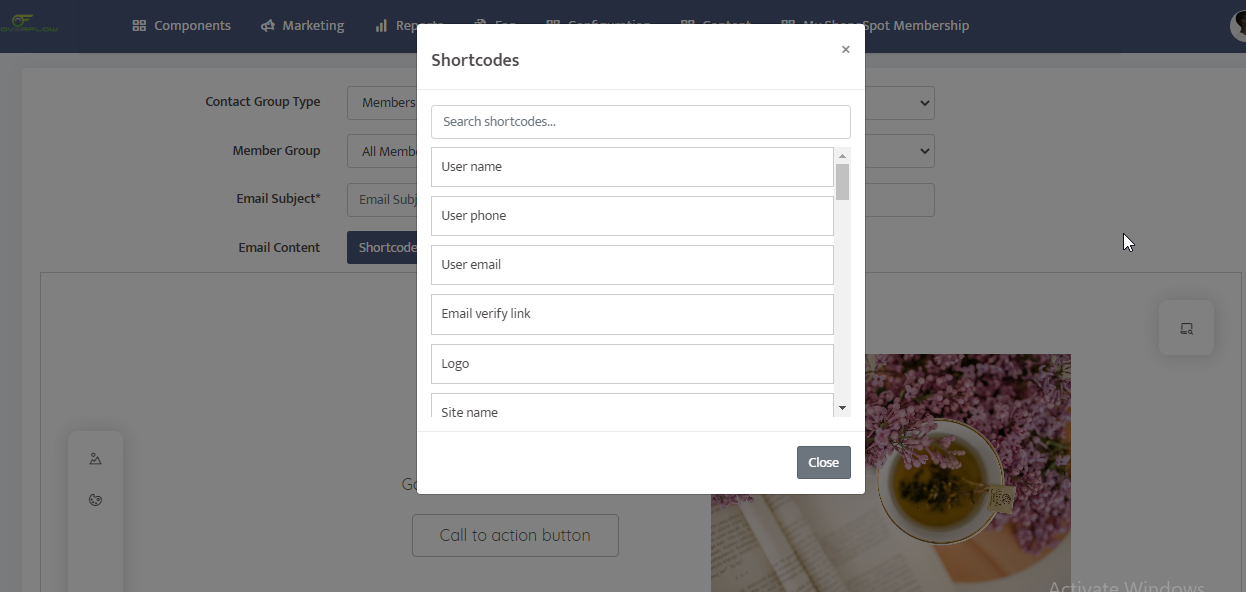
The short codes at the top of the screen can be copied once clicked on and pasted anywhere you wish to have them. These will be able to pull in information directly from your site. Following short codes are examples of what can be integrated into your email.
SHORT CODES AND WHAT THEY WILL BE REPLACED BY
[ @logo] will be replaced by your website's logo.
[ @siteurl] will be replaced by your website's URL
[ @servicesupportnumber] will be replaced by the number/code given to your customer.
will be replaced by your customer’s username with which they signed up with to your site.
+- will be replaced by your customer’s phone number
will be replaced by your customer’s email address
[@emailverifylink] will be replaced by a link asking your user to verify their email.
Shop e Spot will be replaced by your website’s name
[@enquirynumber] will be replaced by the number given to your customer when they make an enquiry.
[@enquiryemail] will be replaced by your website’s enquiry email.
[@contactemail] will be replaced by your website’s contact email.
[@supportemail] will be replaced by your website’s support email.
[@recoverpasswordlink] will be replaced by link in order for your customer to recover their password to log in in order to buy items/request services.
[@promoname] will be replaced by the name of a promotion you are having on your website.
[@promosellingprice] will be replaced by the price of your promotion.
[@servicerequestnumber] will be replaced by the number given to your customer who had already requested a service.
[@singlepromoprice] will be replaced by the price given to an individual item in your promotion.
[@promototalprice] will be replaced by the total price of your promotional items.
[@promosaleid] will be replaced by the ID number you had given to your promotion
[@promocode] will be replaced by the code you had given to your promotion.
[@OTP] will be replaced by the pin your customer will receive when they sign up for an account.
[@orderdetail] will be replaced by the details of a customer’s order when the customer is making an enquiry about their order, or confirming payment on their order.
[@coupontitle] will be replaced by the name of your coupon.
[@couponcode] will be replaced by the code relating to said coupon.
[@couponvalue] will be replaced by the value that the coupon holds, e.g., 50% Off, 20% Discount on specific items.
[@newstitle] will be replaced by the title of the blog/article that you have on your website.
[@newsauthor] will be replaced by the author who wrote said article/blog.
[@newsurl] will be replaced by the URL which will lead the customer directly to the article.
[@orderurl] will be replaced by the URL which will lead the customer directly to their order
[@companyname] will be replaced by your company name
[@companyaddress] will be replaced by your company address.
[@promoquantity] will be replaced by the number or items you have left in stock of said promotion
[@cartdetail] will be replaced by the information in said customer’s cart before a customer makes a purchase.
[@returntocartlink] will be replaced by a link that takes a customer back to their current cart.
[@appointmentdatetime] will be replaced by the details of the date and time that your customer had booked for your service/appointment.
5. ADDING A NEW SECTION TO YOUR EMAIL
If you wish to add an extra section to your email, you should click on the outer layer of your content to bring up a blue + sign.
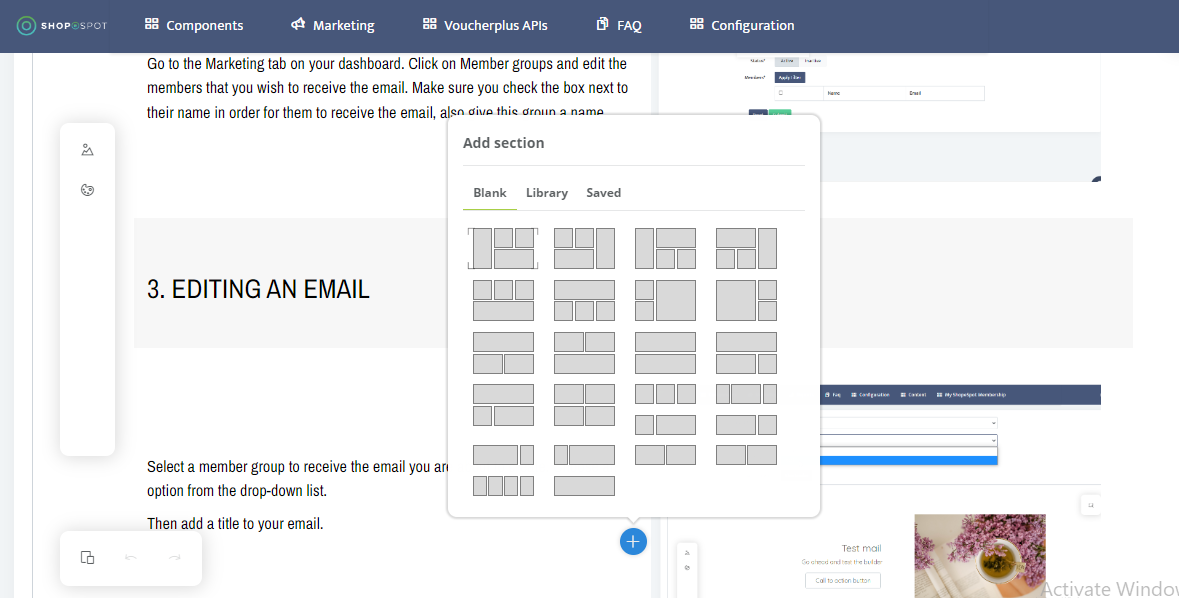
Click on the blue + sign to bring up layout options. Select a layout option. This will be added below your previous content.
You can always add more than one widget to a section, but be careful of a distortion of other tools within the section!
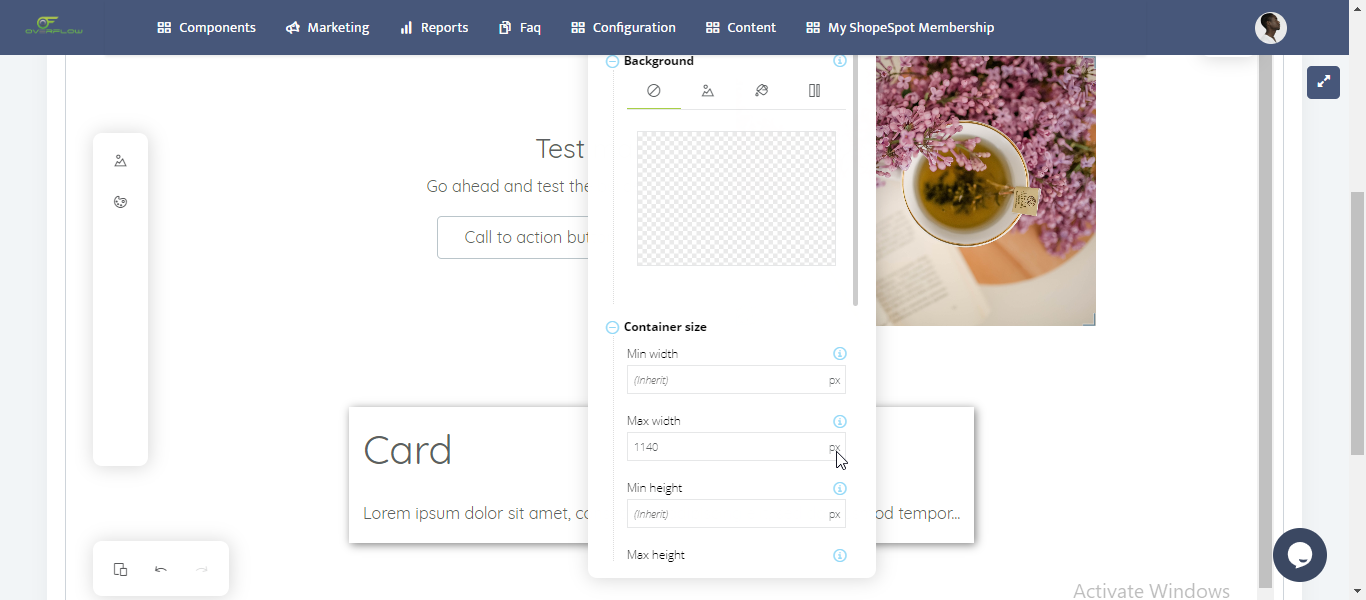
EDITING A SECTION
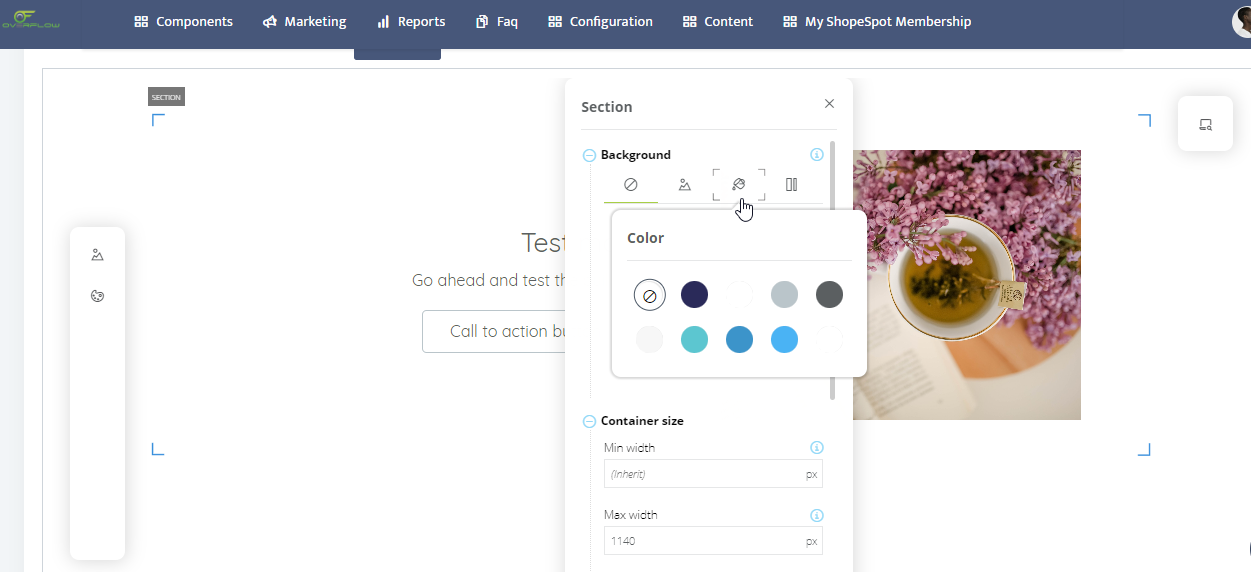
To edit a section, click on the outer layer of your content. Your section will hold your content together within the layout that you choose.
The background tool will allow you to change your background through various means.
Container size allows you to control the size of your section and the elements within it.
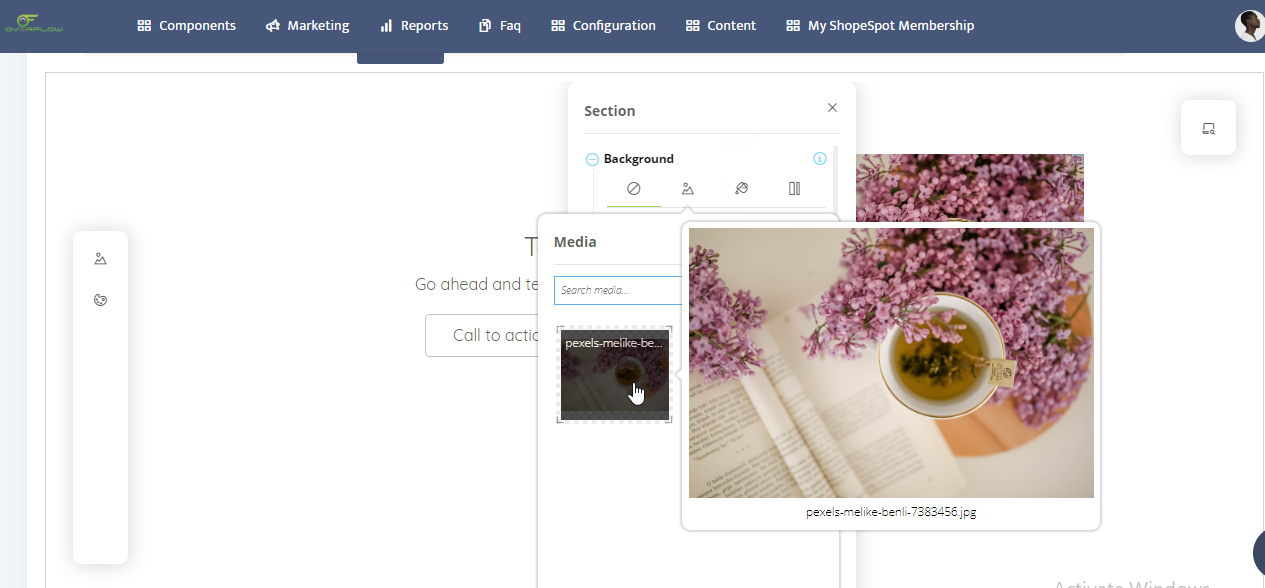
You can also add an image as your background to your section.
You can also change the colour of your background to either a solid or gradient colour.
6. SECTION COLOUR MEANING
When you wish to edit a section, add a new section, delete a section, you should click on the blue options or + sign.
Once you have chosen a layout and wish to add tools within the layout spaces or edit the tools themselves, the grey options are what you should click on.
7. EDITING LAYOUT
Hover your mouse in the middle of an empty layout space in order to show a grey + sign.
Click on this to access the various tools you can add.
Choose an option to edit.
8. EDITING TEXT
Click within the text area to edit the text and font. Type in your content and format it the way you need it to be.
The text tools are as follows:
Tool for numbered lists
Tool for Bullet points
Tool to make selected text Bold
Tool to make selected text Italic
Tool to make selected text Underlined
Tool to toggle
strikethroughon selected textTool to toggle highlight on selected text
Tool to toggle formatted, which will change the
fontTool to toggle different Heading sizes and normal text tool
Tool to toggle regular font or to change text to footer text, indicating it will be smaller.
Tool to toggle left align
Tool to toggle center align
Tool to toggle right align
Tool to toggle justified alignment
Tool to change text colour
Tool to add hyperlink to text.
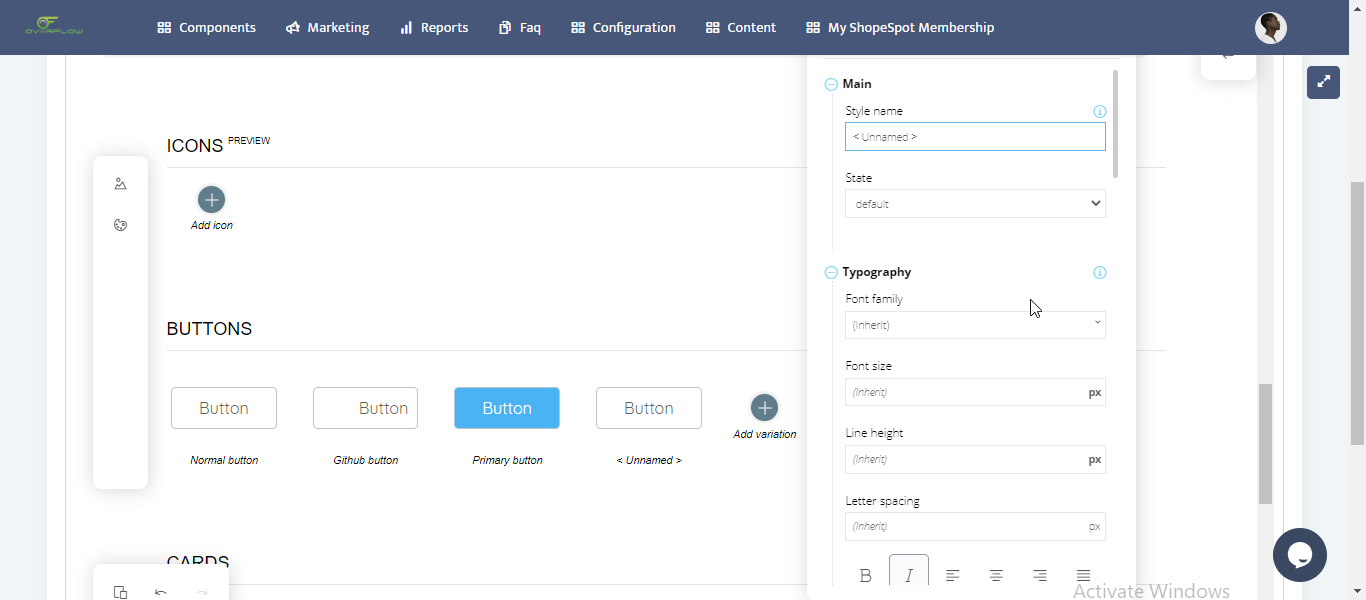
9. EDITING A BUTTON
Click on an empty layout space to add a button.
While hovering over the button, click on the pencil icon to edit the button.
Label – The tool to name your button and what text it will display.
Link to – Option to give your button direction to another web page.
Appearance – The type of button you would like you display.
Visibility – Option to have your button be hidden or visible
Visible to – Option to show button to specific people
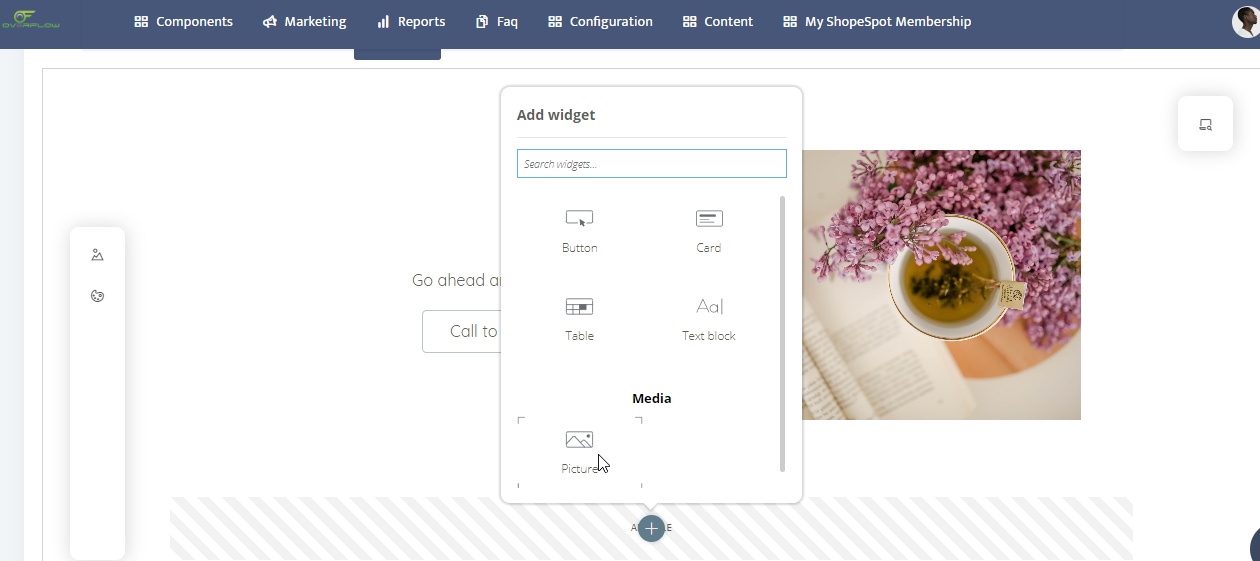
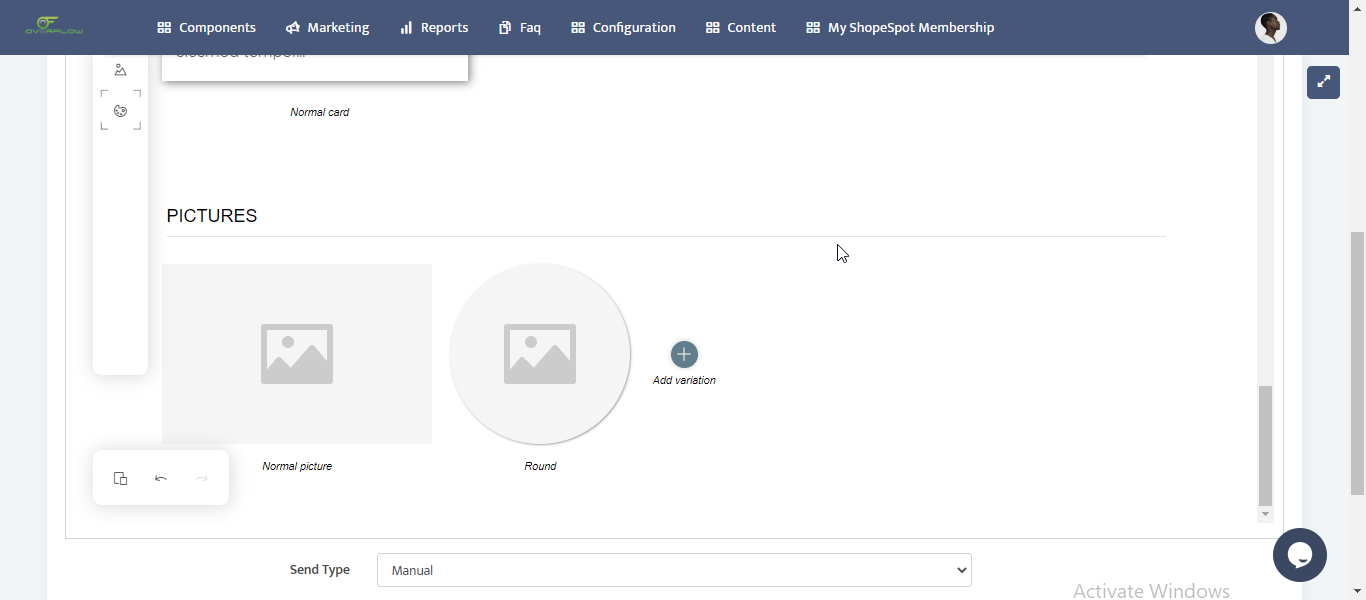
10. ADDING AN IMAGE
Click on an empty layout space to add a widget. Scroll to the bottom of the list to media and click on image. Click on the image section to add an image, then click on the transparent grid to upload your images.
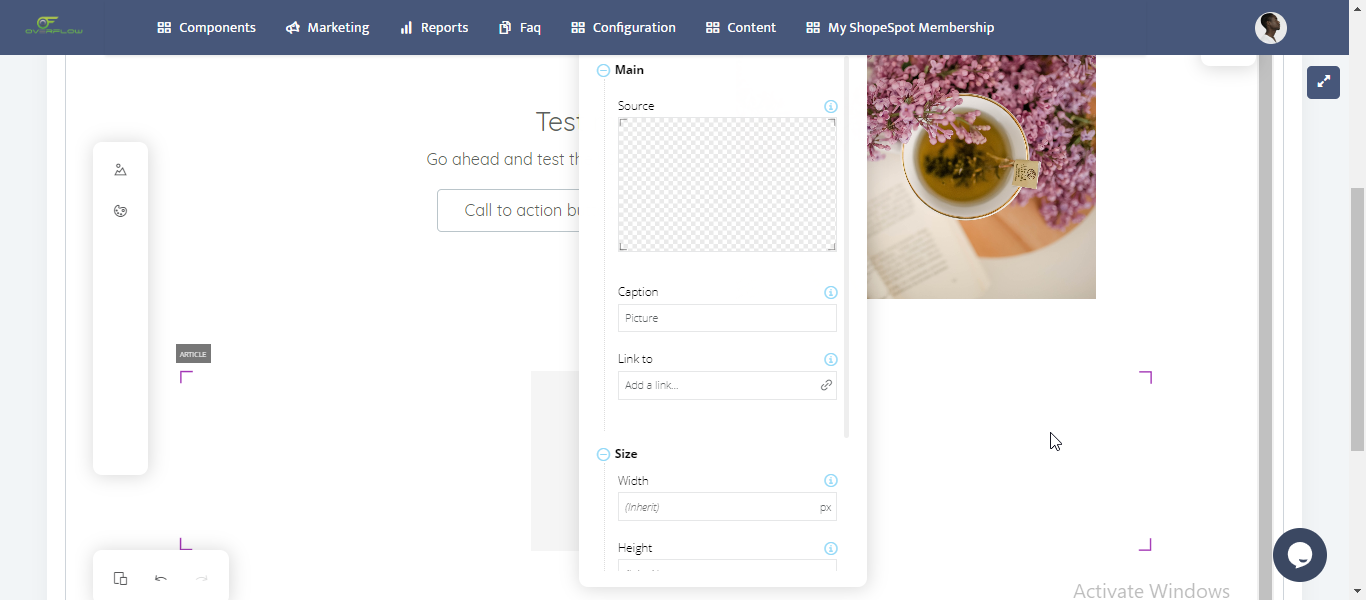
At the bottom, click on “upload file” and choose the images you wish to add to the email.
You can also give your image a caption.
The Link To option allows your image to be a link to a web page once clicked on.
To avoid your email becoming distorted, use the Size option to resize your image to the correct proportions and context of your email
Through the Styling option, you can choose to leave your image to appear to be normal or select the round appearance.
11. EDITING THE TABLE TOOL
The table tool can be used for adding in statistics or any extra content you wish to add. You can edit each column individually.
You can also edit the row individually.
You can also add in a different tool within each cell.
You can edit the width and the padding of the column.
Each cell can also be edited individually. You can set the alignment and padding of the cell.
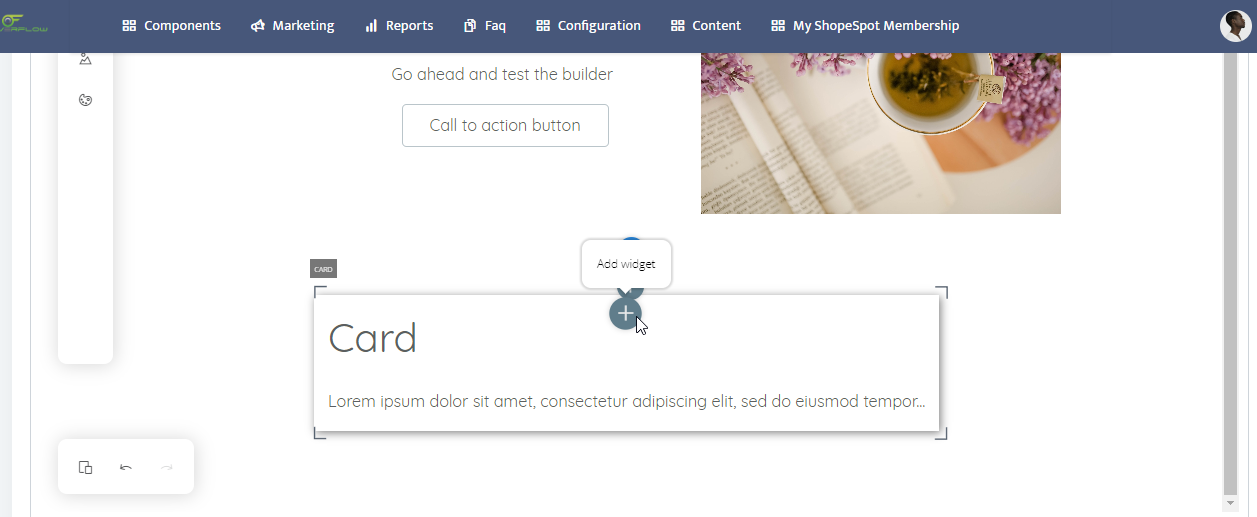
12. EDITING THE CARD TOOL
The card tool is an extra tool that you can add if you wish to display anything extra such as vouchers or coupons, or even gift cards. The card tool can be used for adding extra eye-catching content to your email. Double click on its border to activate the editor panel of the card.
You can add a background colour, gradient or image to your card. If you choose a background image, the arrow you click on will show that part of the image you chose.
Background sizing will allow you to choose how to have your image displayed within the box.
Background attachment will let you choose if you would like to have your card stay in position while scrolling or to be fixated on the email in its position.
Background blending mode will allow to you choose the blending options for your card’s appearance. Each blending mode will change the card’s appearance against the background of the email.
Content alignment will allow you to choose the alignment of your card tool.
Styling will allow you to choose the type of card you wish to display.
The Styles option holds all the creative options for you to add, edit or delete certain styles for your email. They will appear on the left of your screen.
You can add/edit/delete:
Colours for text/sections
Gradients
Fonts
Image Appearance
Buttons
Unordered/Ordered Lists
Cards
Shadows
14. MEDIA

The Media panel is there to let you see and upload your images that you want to include in your email.
The Upload option is for you to upload your images to the server and use them in your email.
The link file will allow you to see and add any links to your image in order to direct your reader to wherever you want them to be directed to.
15. EMAIL FUNCTIONALITY
The new email builder tool is meant to help you as a partner of Shopespot, increase your sales and exposure. It is also meant to help you with up sales of your products and services.
Keeping in touch and in contact with your customers is also another benefit as it is keeping them engaged with your content. The email tool also helps you connect with your customers and build better customer-brand relationships
NOW YOU ARE A PRO DEVELOPER
FOLLOW, LIKE AND SHARE